Reupholstering an old armchair can save money, reduce waste, and restore a meaningful piece of furniture. This guide explores How to reupholster an old armchair on a budget? It focuses on practical repairs, affordable fabrics, and careful spending.
The U.S. Environmental Protection Agency reported that Americans generated 12.1 million tons of furniture and furnishings waste in 2018. Much of that material reached landfills. The 2024 Circularity Gap Report also found that the global economy was only 7.2% circular. These figures make small furniture repairs more relevant, even inside one modest home.
Annie Sloan, a respected furniture upcycling expert, says, “There are no rules when it comes to painting furniture.” Her idea also supports creative upholstery choices. A faded chair may need new webbing, foam, and fabric, but not a complete replacement. Start with the frame. Check every joint before buying supplies. A loose leg can ruin beautiful fabric.
I have repaired chairs where the fabric looked worse than the structure. That can be encouraging. It can also mislead beginners. Cheap fabric may tear quickly, while premium fabric can exceed the chair’s value. Measure twice. Add extra fabric for pattern matching and mistakes. Expect at least one imperfect corner.
This introduction presents expert-informed methods, realistic cost checks, and safer workshop habits. You will learn when to reuse padding, where to economize, and when professional help is wiser. The goal is not a showroom finish. It is a sturdy, comfortable chair with a second life.
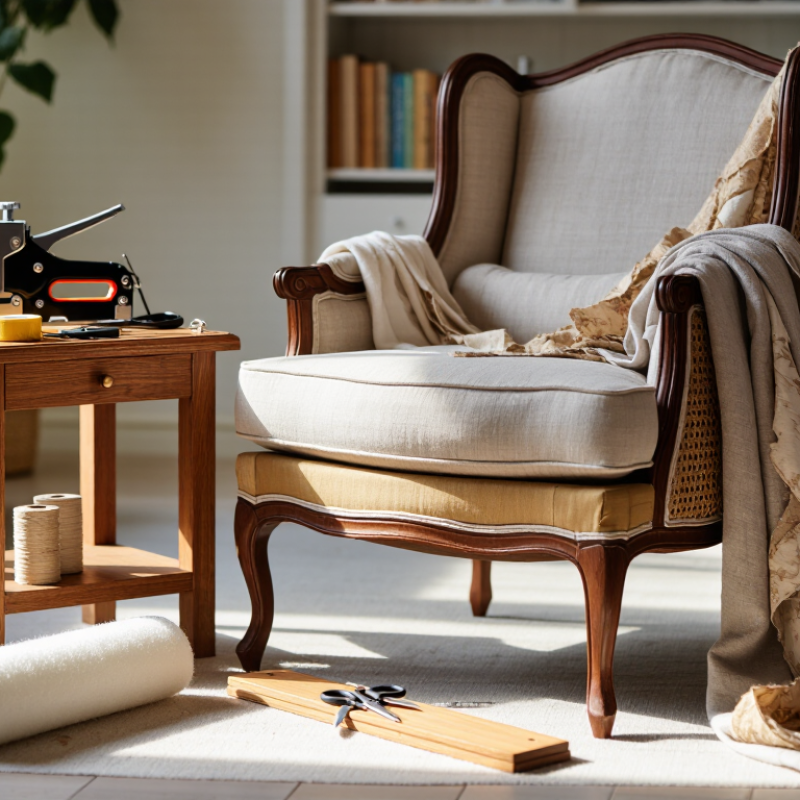
Assess the chair before buying fabric. Set it on a level floor and gently rock it. Listen for creaks, then inspect the legs, joints, and underside for loose screws, cracks, or water damage. A sound frame is worth saving; a badly split rail may need skilled repair. Check every joint. Also measure the seat, back, and arms, adding extra fabric for pattern matching and mistakes.
Tip: Remove a small section of old fabric first. It can reveal the original layer order and show whether the foam is flattened or crumbling. Press the seat foam with your palm. If it stays dented, budget for replacement; if it springs back evenly, reuse may be possible. Keep the old cover intact as a rough cutting guide. It will not always lie flat, which can be frustrating.
Set a 2026 budget using local prices, not a guess from an old tutorial. List fabric, foam, batting, staples, and any rental tools separately. Reserve about 15 percent for surprises, such as rusty fasteners or extra fabric. Do not rush. Compare upholstery-weight fabric by usable width, and ask for a sample if color matters. A basic staple gun can help, but uneven tension leaves wrinkles. Small flaws matter. Recheck the frame before covering it; discovering a loose joint afterward is an avoidable headache.
Before buying upholstery fabric, measure each armchair section separately: inside back, outside back, seat, arms, front rail, and any loose cushions. Use a flexible tape and record the widest and longest points. Add seam and tuck allowances where the fabric wraps around edges. Then total the pieces, checking the fabric’s usable width rather than relying only on its label.
Add a 10–15% waste allowance to your estimate. That margin covers trimming, crooked cuts, small mistakes, and fabric hidden beneath the chair. It matters even more when the fabric has stripes, checks, or a directional nap, since patterns may need careful alignment. A large repeat can require more than 15%, so ask the fabric supplier how much extra your layout may need. That margin matters.
For a budget-friendly check, sketch each piece on paper and arrange the shapes within the fabric width before ordering. Keep the sketch. Measure twice. I’ve seen careful estimates still come up short when a chair arm curves more than expected; old upholstery can also stretch, so it may not be a perfect template. Extra fabric costs money, but running short can leave you with mismatched sections or a costly second purchase.
| Armchair style | Base fabric estimate | With 10% allowance | With 15% allowance | Approx. fabric cost at $15/yd |
|---|---|---|---|---|
| Compact armchair | 4 yd | 4.4 yd | 4.6 yd | $66–$69 |
| Standard armchair | 5 yd | 5.5 yd | 5.75 yd | $82.50–$86.25 |
| Large club chair | 6 yd | 6.6 yd | 6.9 yd | $99–$103.50 |
| Wingback armchair | 8 yd | 8.8 yd | 9.2 yd | $132–$138 |
Estimates assume 54-inch-wide upholstery fabric and a plain or small-scale design. Actual yardage varies with chair dimensions, fabric width, cushion construction, and the cutting layout.
Measure each upholstered section at its widest and longest points, including seam and stapling allowances. Add 10–15% for ordinary cutting waste; allow extra for stripes, large pattern repeats, or pattern matching. Fabric costs exclude tools, foam, batting, and other supplies.
For a budget armchair refresh, choose seat foam with a density of 35–40 kg/m³ for regular use. Density indicates how much material is packed into the foam; it is not the same as firmness. Sit on a sample if possible. A firm, supportive feel can suit everyday seating, but comfort is personal. Measure the seat from front to back and side to side, then check the cushion depth before ordering. A few millimeters matter.
Tips: Keep the old cushion as a template. Cut slowly with a long, sharp knife, and test the fit before replacing the fabric. The foam should fill the seat without bunching the cover.
If the chair has a sagging base, new foam alone may not solve the problem. Check the webbing or springs while the upholstery is removed, and repair loose support before fitting the cushion. I once cut a piece too wide and had to trim it twice; rushing made the edge uneven. Leave a little room for the cover, but avoid gaps that let the cushion shift. A well-fitted seat feels steadier and helps the new upholstery sit smoothly.
2026 Top Tips: How to Reupholster an Armchair on a Budget?
Before removing anything, photograph the chair from every side, then take close-ups of seams, corners, and the underside. Snap each layer as it comes off. Label pieces with masking tape, such as “left arm, outer fabric,” and keep fasteners in a jar. These photos become a practical map when the new fabric hides the frame. Small details matter.
Remove staples slowly with a tack lifter, not a rushed tug. Keep one intact fabric panel as a pattern, and note where the original fabric was stretched or folded. Check the exposed frame for loose joints, cracked rails, and rusty springs. Tighten or repair those before adding padding; new upholstery will not fix a weak frame. The U.S. Environmental Protection Agency’s 2018 Advancing Sustainable Materials Management report estimated that 12.1 million tons of furniture and furnishings entered the U.S. waste stream. Careful repair can help keep a usable chair in service.
A small reality check: photographs can miss a staple line or the direction of a curved panel. Add written notes and measurements, especially where the seat meets the arms. If the chair has complicated spring work, pause and assess the repair before buying fabric. That delay may save money. Keep the old cover pieces until the chair is finished.
Strip the chair carefully, repair the frame, and photograph each upholstery layer before removing it. These approximate DIY material costs are planning estimates for one armchair; actual prices vary with chair size, fabric choice, and local prices. Existing tools can reduce the total.
Estimated total: $110–$265, including up to $30 for optional tools. Costs exclude labor and delivery.
Remove the seat and old fabric carefully, keeping each piece intact. Check the chair frame and padding before buying supplies; worn foam may need replacing, while sound padding can stay. Lay the old cover over the new fabric and match its grain or printed lines. Add several centimeters around each edge for folding and stapling. Cut one piece first, then test its fit. Fabric is cheaper than fixing a rushed cut.
Center the fabric on the seat, then place one staple at the midpoint of each side. Pull across the seat, not diagonally, and add staples outward in short, alternating passes. Check tension after every few staples: the surface should feel smooth, but the weave should not distort. Not drum-tight. Press the center and inspect the edges; ripples often mean tension is uneven, not simply too loose.
At corners, fold small, consistent pleats and keep bulky fabric away from screw holes. Trim excess only after the fabric sits flat and the staples hold securely. A hand stapler can be more tiring than expected, and a first pass may still need adjustment. Remove a few staples and reset them rather than pulling harder. Refit the seat and check that the fabric stays taut when you sit down.
Measure the inside and outside backs, seat, arms, front rail, and loose cushions separately. Record each piece’s widest and longest points, including wraps and tucks.
Add 10–15% for trimming, hidden edges, and small cutting mistakes. Stripes, checks, or directional nap may need more. Ask about pattern repeats.
Yes, keep each old piece intact and match its grain or printed lines. But stretched fabric may not match the chair perfectly. Check the shape twice.
Sketch each piece on paper and arrange the shapes within the fabric’s usable width. Keep the sketch. A curved arm can still make estimates fall short.
Foam around 35–40 kg/m³ is a useful starting point for everyday seating. Density does not determine firmness, so test a sample if possible. Comfort varies.
Use the old cushion as a template, then measure the seat in both directions. Cut slowly and test the fit before covering it. A few millimeters matter.
Not necessarily. Check the webbing or springs while the upholstery is off. Loose support can cause sagging even with fresh foam.
Center it and place one staple at the midpoint of each side. Pull across, then staple outward in short alternating passes. Check often. At corners, use small pleats and keep bulky fabric away from screw holes.
Aim for a smooth surface without distorting the weave. Ripples may mean the tension is uneven. I once cut foam too wide and trimmed it twice; rushing left an uneven edge.
Reupholstering an armchair can be an affordable way to refresh a room, provided you plan before pulling out the staples. Begin by checking the frame for loose joints or damage, assessing whether the existing padding can be reused, and setting a realistic 2026 DIY budget for fabric, foam, tools, and small repairs. Measure each upholstered section carefully and add a 10–15% allowance for matching patterns, mistakes, and upholstery waste. For a seat used every day, choose firm, supportive foam with a density of around 35–40 kg/m³ for lasting comfort.
A careful strip-and-rebuild process helps keep the project manageable. Remove the old upholstery layer by layer, photograph each stage, and note how the fabric was attached so you can use it as a guide. Repair the frame and replace worn padding before cutting the new fabric. As you staple, pull the fabric evenly and check the tension on every side to avoid wrinkles and distortion. With patience and a clear plan, How to reupholster an old armchair on a budget? becomes a practical DIY project rather than an expensive replacement.

Govind Sofa